4 Easy Steps To Amazon KDP Publishing | Earn Big With Low Content Books
At no additional cost to you, as an affiliate of Amazon and other organizations, I may earn money or products from the companies mentioned in this post. When you use my links, you also support this single mom. Thanks! Read the privacy policy and disclosure here.
Easily Earn A Passive Income Creating Blank Books!
I think I may have found the easiest side hustle ever! It is by creating low content books and listing them through Amazon KDP (Amazon Kindle Direct Publishing).
If you have no clue what I’m talking about, don’t worry, I’ll explain:
- What are low content books?
- How to design low content books.
- How to publish low content books and make a passive income.
- How to spy on your competition to increase sales of your books!
Plus, I’ll tell you my secrets to finding low content book ideas and how I create them in just minutes!
I have done many side hustles including mystery shopping, audiobook narration, YouTube, and many other work from home jobs, but low content books are the easiest!
So, if you want to work from home and sell low content books on Amazon KDP in just 4 easy steps, read on!
What are low content books?
Let’s start with the basics and let me tell you what low content books are. Low content books (sometimes called no content books) are books in which the customer creates the content. Examples of this include:
- Notebooks
- Journals
- Calendars
- Activity Books
- Coloring Books
Basically, the low content books are nearly blank. They will include minimal content like lines, blank puzzles, empty boxes for calendars, and so on.
We have all used these types of books, so you know the demand is high. What does that mean? Solid opportunities to make money!
And the best part is, using the steps below, you don’t have to do any of the selling, customer service, printing, or shipping of the books! Sound good? Keep reading!
Exclusive: Access the full low content book tutorial!
4 Easy Steps to Make Low Content Books:
On to what you came here for. If you want to quickly create these simple books, and make money in your sleep, it can easily be done. Just follow these 4 steps, and you’ll be on your way to making a passive income!
Step 1: Create an Account on Amazon KDP
Before you create a book, you’ll need a place to sell it. So you will need to create an Amazon KDP account. This platform makes it so easy to sell your books online. If you know about my audiobook narration story, it’s easy to understand that KDP is Amazon’s version of ACX, their audiobook publishing platform. And it’s also free!
To create an Amazon KDP publishing account, you can easily link it to your existing Amazon account.
Tip: If you don’t yet have an Amazon account, can get your first 30 days of Amazon Prime here.
Sign up for Amazon KDP at: https://kdp.amazon.com/.
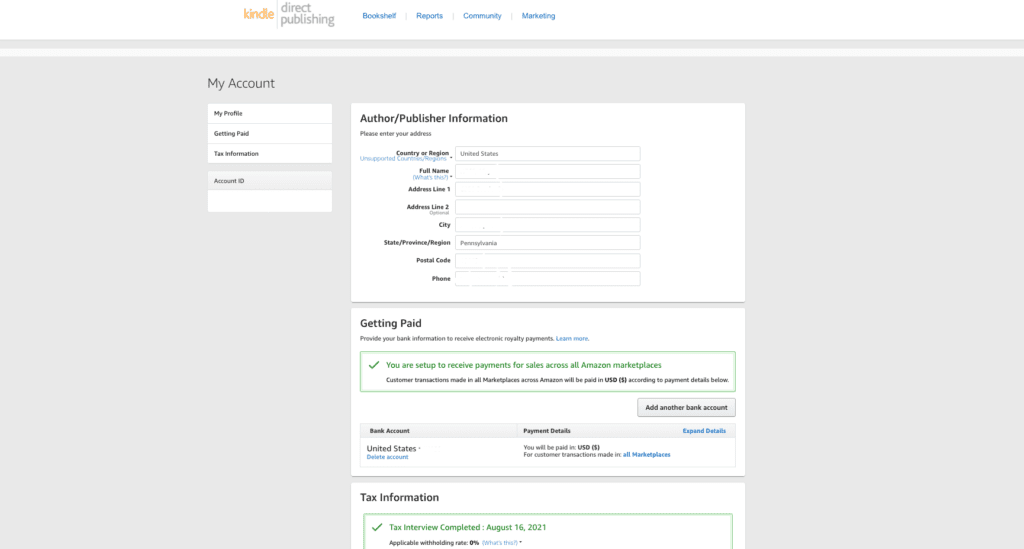
You will have to input your contact information, W-9 tax information, and your bank information so you can get paid for your book sales.
Royalties from your book sales will be paid two months after the sale is made. The great thing is, when you sign up for direct deposit, there is no minimum threshold for Amazon KDP. So, if you earn $5, they’ll send the $5 to your bank account when payout is due.
Step 2: Research Low Content Book Ideas
When you are new to publishing, figuring out which types of low content books you should create can be exhausting. But I found a way to not only research low content book ideas, but also design and rank my books well on Amazon KDP for higher sales! It’s a website called Book Bolt.
Book Bolt has many cool tools to help you research what types of books are selling. They have a variety of plans for every budget. Plus have a 3-day free trial. And if you use my Book Bolt coupon code, NIKKI20, you will get 20% off any membership for LIFE!
My favorite feature of Book Bolt is KDP Spy. This tool lets you dive in and see how other people’s books are selling on Amazon. That way, you can figure out the types of designs that people are migrating to so you can create your own version of that book resulting in an opportunity to rank higher.
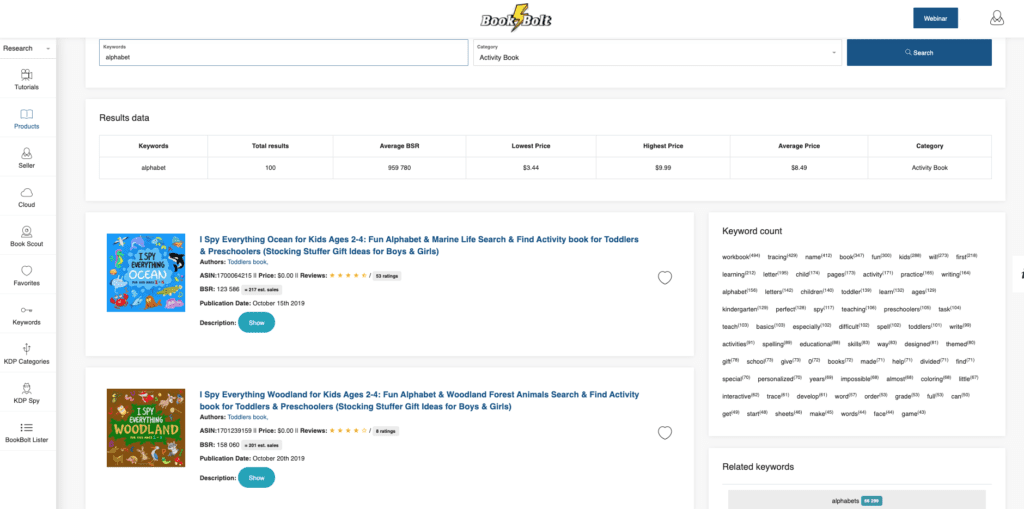
Another great research tool is the Book Bolt “Products” tab. Here, you can input a keyword, and choose the type of book you would like to research. In the example below, I researched the topic, “alphabet” in the “activity books” category.
TIP: Activity books are the top-selling category of low content books on Amazon.
Using Book Bolt for my research showed me lots of useful information. My favorite things to pay attention to are:
- Which keywords are popular.
- The highest, lowest, lowest, and average price of that type of book.
This information helps me choose how to price my own book. I like to price my books approximately $1 cheaper than the average price. If I slightly undercut the competition, it helps my chance of making a sale!
Step 3: Design your low content book
Now for the fun part! Creating the book. Here, you have a couple of options to make designing your book super easy.
Option 1:
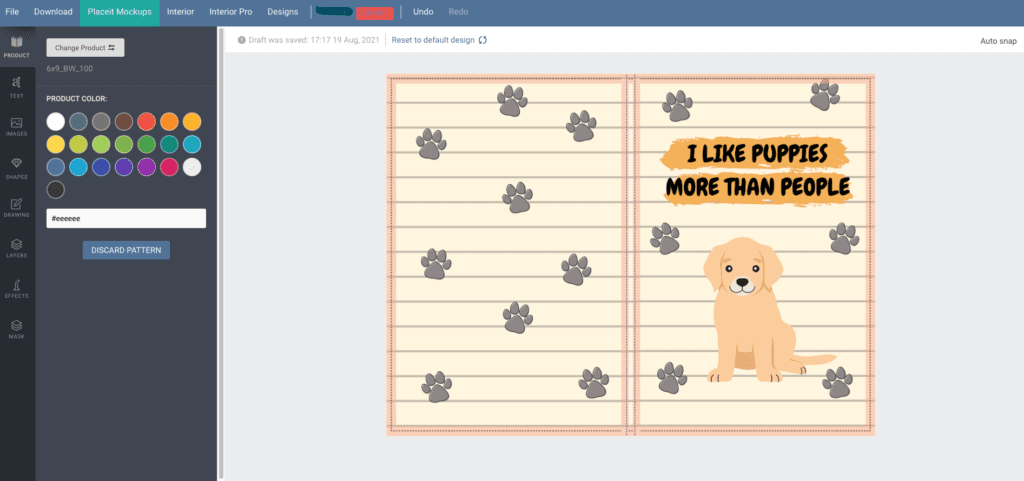
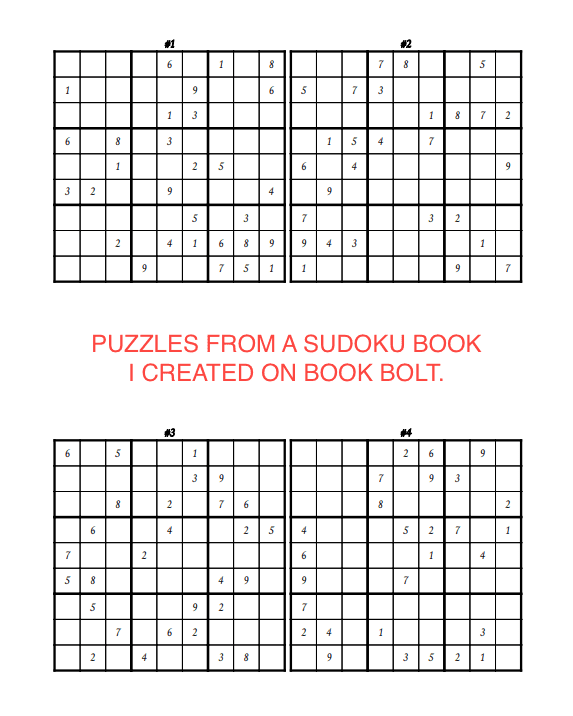
If you have a Book Bolt membership, you can use the Book Bolt Designer to create the interior pages and the book cover. I have the Book Bolt Pro membership. The designer has many templates for any type of book you want to create. From crossword puzzles to record-keeping books, they have it all. And most times, the pages can be created in just seconds. Even if your book is over 100 pages!
If you want to create the front and back covers, that can also easily be done with the Book Bolt Designer. They have copyright-free images, text, shapes to help you make an appealing book that Amazon customers will want to buy.
Option 2:
While I prefer to use the Book Bolt Designer for my interior pages, I prefer to design my low content books using Canva then tweak them on Book Bolt. (Don’t worry, I’ll explain).
Canva is a free platform where you can create endless products including book covers, flyers, slide show presentations, and even videos. And that’s just the tip of the iceberg.
While it may seem like it’s a duplication of effort to use two different design platforms, trust me, it helps a lot! I use Canva to create thumbnails for my YouTube channel and almost all of my Instagram posts, so I’m most comfortable designing there. Also, I have a Canva Pro membership, so I have access to MANY more elements on Canva. This raises my chances to have copyright-free images that less people have access to.
Canva also has a free option that includes copyright-free images. But anyone can use those. I wouldn’t want to risk having the main image on my book cover being the same one used by multiple sellers. Having a Canva Pro membership is worth it if you want access to lots more elements. (If you choose the free version of Canva, use this link, and I’ll gift you a free Canva Pro element).
But when it comes to creating a low content book cover, I can easily design my front and back covers, download them, then add them to Book Bolt Cover Designer. This puts my creation on their platform so I can easily upload the product to Amazon KDP.

Option 3:
Use the Cover Creator on Amazon KDP. Just be warned, the images are nowhere near as plentiful or appealing as what you’ll find on Book Bolt or Canva. But you can create your book cover from start to finish using the Amazon Cover Creator at no cost. So, it can still be useful.
Step 4: Publish low content books
After you’ve created your low content book, you need buyers. Head over to Amazon KDP and log in to the account you created in step 1.
From there, you can either use the Book Bolt Lister to fill in information about your book including the author’s name, book title, pricing, and description. Then have it populate over to Amazon KDP. They have video tutorials on how to do this. Or, you can input the information directly into Amazon KDP. The upside of using Book Bolt Lister is you can save the information for subsequent books to save yourself time when you are creating new books.
A great thing about Amazon KDP is that they will create a barcode for your low content book at no cost. Plus, they will handle the book printing, shipping, and all customer service for the sale of your book. Of course, that means that they will take a cut of the sales, but it’s only fair. They’re taking on the cost of turning your digital product into a physical product.
When publishing to Amazon KDP, remember:
- Check your spelling! This includes your book cover and description when listing on Amazon KDP. I highly suggest Grammarly it’s an incredible proofreader, and it’s free!
- Your book title must match the title of your book.
- Descriptions can be simple, but if you need help with formatting, I suggest the Kindlepreneur Book Description Generator.

All done! Once your book is submitted to Amazon KDP, it will typically be approved within 3 days. And you will be making a passive income on your sales.
But don’t stop there! The more books you create, the more of a chance that you will create a book that sells well. There are a lot of people making Amazon KDP low content books. That’s why I prefer to use Book Bolt to create and list my books. I can create many more books using Book Bolt, than any other method. And let’s not forget, spy on my competition!
Remember to use my Book Bolt coupon code, NIKKI20, for 20% off any membership for LIFE when you sign up! And the Book Bolt free trial for 3 days, too!
Check out my full Book Bolt tutorial above.
Learn how to build a low content book business from scratch!
And if you want to turn your single low content book into 4 separate products to make more money, watch this:
[embedyt] https://www.youtube.com/watch?v=b9oSUCTlwsw[/embedyt]Feel free to drop any questions here or under my YouTube video. Good luck with your books!
You can find many more side hustles here!
